


Production Bench Rockwell Hardness Testing of Small Work Pieces
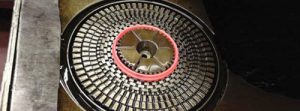
As induction hardened workpieces get smaller in size, attention to the proper abrasive cutting of the sample becomes more important. Of further importance is the selection of the right scale of Rockwell diamond penetrator. Many heat treat areas have limited metallurgical test and sample preparation equipment and, in many cases, only a bench hardness tester is available. %%0914_MU_Fig1%%
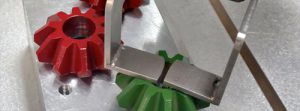
Heat treaters must learn to cut and check different workpieces of various sizes, shapes, and configurations. Because each is unique, the way you cut them varies dramatically. Splines, gear teeth, angles, blind holes with threads, shoulders, and flanges can all present challenges to selecting the area to be cut, as well as how to slice in the least amount of operations to get to the sample area to be tested.
Using an abrasive wet saw with multiple spray heads each with adjustable point of spray and individual adjustment of flow is important (%%0914_MU_Fig2%% a and b). Cutting the sample without changing the microstructure or hardness from overheating or burning is of utmost importance. Enough cannot be said that this single step be done without any temperature rise in the workpiece, as lower hardness will result. The smaller the workpiece size, the easier it is to burn the sample. A false rejection of the sample submitted for testing can waste valuable set up and induction equipment production time. A vicious cycle of set up, run samples, submission, and false rejection can take place as the cutting/burning of the sample causes low hardness readings.
Blade selection is almost as important as water cooling set up. The cutting blade selection should be more to the soft side of nominal, as too hard of a blade causes overheating of the sample and too soft can have quick (short life) wear of the blade. Various manufactures/distributors have charts to make the correct blade selection.
Cutting of different diameters presents planning and thought provoking methodology prior to the cut at the centerline of the workpiece so that the induction case depth is correctly shown. Cutting off the midpoint will yield an incorrectly shown case depth, so centering of the cut on the workpiece is important.
After the workpiece is sectioned, the sharp edges and surfaces should be progressively sanded and polished to remove saw blade marks until a flat smooth surface is obtained. In order to ensure that the previous rough grinding damage is removed when grinding by hand, the specimen should be rotated 90 degrees and continually ground until all scratches from the previous grinding direction are removed. If necessary, the sandpaper can be replaced with new paper to increase the cutting rate. Progressively lighter grit can be used to smooth out all polish marks. %%0914_MU_Fig3%%
Once the workpiece has been cut and all cut and grinding marks are polished off of both sides, a smooth, almost reflective surface can be hardness tested.
The next decision is to select the correct Rockwell hardness scale to conduct the tests. Please review ASTM E18 for proper selection based on case depth and size of the sample—usually, the smaller the sample, the lighter the load to be used.
The Rockwell test is probably the most common hardness test used in industry today. Many different scales are used, each of which may give a different hardness number within each scale. The difference between the various Rockwell scales is the method of indenting the material. For the Rockwell “A” scale, an indenter with a sharp point called a Brale indenter (diamond) is used. The Rockwell “A” reading for a particular material might be about 80.6. The same sample tested with a higher load drives deeper into the material, giving a Rockwell “C” reading of 58.8.
All the Rockwell scales measure the depth of penetration into the material. The difference is the shape of the indenter and the force used to push the indenter into the sample. This gives the user the ability to select an indenter that will make a shallow impression or a relative deep hole in the sample (%%0914_MU_Fig4%%). Positioning of the indenter test needs to conform to ASTM E18 and stay at least 3 diamond marks away from the sample edge or from another previous test mark. Any movement whatsoever of the sample during testing will cause a lower hardness reading.


 general practice for CQI-9 and AMS2750E")


