Editor’s note » This is the fourth of a five-part series of articles that will deconstruct the requirements of AC7102. Each article will appear every other month through 2021. Part 1 was published in February, Part 2 appeared in April, and Part 3 was featured in June.
Hardness and conductivity testing are common tests used to validate a specific heat treatment. Depending on the material and heat treatment, different types of tests exist to accommodate just about any results needed. Unfortunately, Nadcap does not have a list of the top-10 findings associated with hardness testing, so I will be discussing items I see as common challenges.
In the following article, we will discuss the challenges associated with AC7102/5. There is no job audit section to this checklist as it is covered within AC7102, the main (or baseline) heat-treat checklist.
The Structure of AC7102/5
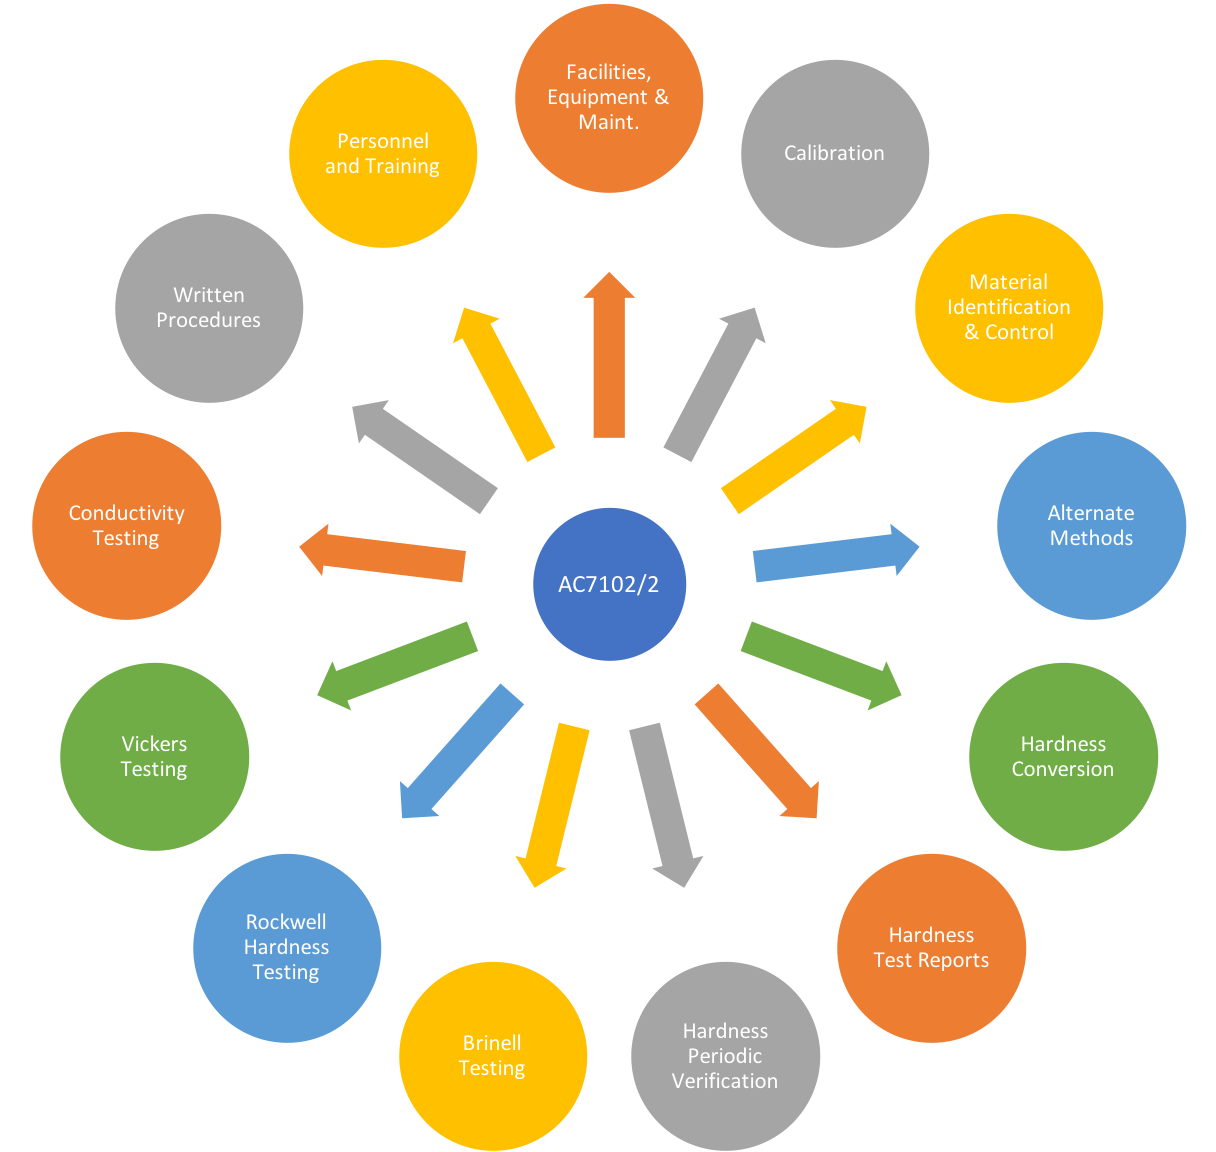
AC7102/5 has 13 sections, as shown in Figure 1. In this article, we will visit areas of these sections that tend to challenge suppliers.
There are several industry and prime specifications that apply directly to hardness and conductivity testing. The PRI Heat Treating task group has attempted to include those general requirements into AC7102/5.
Section 1: Written Procedures
Section 1 in this checklist is very similar to other checklists as it outlines what should be documented, as a minimum, within internal procedures. Some challenges are specific items are not listed, such as the number of tests or impressions for each test value reported. This means that, if you take three impressions and average them, this should be listed within internal procedures/documentation. If, as most suppliers do, one test or impression equates to a single value reported, this should also be stated within your internal procedures. Another item that is sometimes missing from internal documentation is the locations for performing testing. It is common for suppliers to put default wording into the procedure with a reference to travelers and/or work instructions if specific areas are required based on PO or print.
Section 2: Personnel and Training
Qualification for hardness-testing personnel, as with any process, is important. Qualification should relate to a supplier’s specific testing process used. At times, I visit suppliers who have a more general approach to training. As an example, they may teach their operators about tensile material testing even when it is not performed. This section requires that hardness test operators are trained, per industry procedures, on how to perform verification testing, as well as testing of parts. Training for testing of parts must include a representative geometry of parts. This may include round or flat specimens, depending on what is tested. Qualification of operators typically includes a written test that will include procedural requirements, as well the trainer witnessing the trainee perform verification testing and part testing. There should be some frequency for requalification as well. This may include steps such as if the operator has not used the machine in more than six months and/or if quality feels the operator is no longer competent. Additional testing may be required on a specific frequency such as operator requalification being required every five years.
Section 3: Facilities, Equipment, and Maintenance
The only portion of this section that is sometimes missing is the statement regarding maintenance. ASTME-18 requires maintenance to be performed. Typically, this is stated on the indirect verification certification and should be requested when issuing a PO to the outside service performing the indirect verification. Internal procedures should state that maintenance is performed during the indirect verification and that it must be verified on the indirect certification upon completion.
Section 4: Calibration
The most challenging portion of this section of late has been the question in paragraph 3.2.4.1 related to direct verification. A Nadcap HT Auditor Advisory (HT 18-009) was issued October 2, 2018, and states all testing machines must show evidence of direct verification. This is done at the manufacturer when the machine is new or when major repairs are performed. Some suppliers have had the machines so long that they no longer have evidence of the direct verification being performed. Regardless, all suppliers must have evidence showing the direct verification was performed, even if it means sending your machine back to the manufacturer to get it done.
Section 5: Material Identification and Control
This section does not contain requirements I typically see any challenges with.
Section 6: Alternative Methods
This section does not contain requirements I typically see any challenges with.
Section 7: Hardness Conversion
This section is straight forward: When using hardness conversions, use ASTM E-140 for the conversion and report both the measure value and the converted value.
Section 8: Hardness Test Reports
The most common challenge I see in this section is the question in paragraph 3.6.4. While procedures may state this, often, there is no place for operators to identify this. When needed, this could be logged/identified on the daily verification report or even the hardness testing log.
Section 9: Hardness Periodic (Indirect and Daily) Verification
This section outlines the requirements for both indirect (typically annual) and daily verification. For Rockwell hardness testing, ASTM E-18 goes into much greater detail than what is in the checklist, so it is important to understand the industry specification that applies to your testing process. Two of the most common challenges I see in this section is indenter qualification and reference to the ASTM E-18 revision. When looking at an indirect verification certification, one of the items to check is if all indenters available for operators to use are included in the certification. This portion includes keeping a record of when indenters are removed or replaced. The second challenge I see is the certification reflecting the correct revision of ASTM E-18 for the date of calibration.
Section 10: Brinell Hardness Testing
The Brinell hardness testing section is similar to the hardness testing section, except for some select items. For example, there are specific scope requirements, sample thickness requirements, and major load cycle time. The most common challenge I see is ensuring the load is applied for 10 to 15 seconds.
Section 11: Rockwell Hardness Testing
This is, perhaps, the most widely used portion of AC7102/5 as Rockwell hardness testing is used more often than any other type of testing. This section speaks to the verification testing requirements, as well as manual control. Within this section, I have noticed many challenges for suppliers. One of the first challenges relates to direct verification. This issue was covered in Section 9. It is very important to have evidence of direct verification which conforms to ASTM E-18, or suppliers are likely to receive a finding. The most common challenge I have seen is with regards to the question in paragraph 3.9.2.2. This question asks if center-to-center spacing on test blocks is in accordance with the applicable specification (usually, ASTM E-18). The key to this is to make the statement, with limitations, within internal procedures. It is not that uncommon to accidentally violate the spacing requirements. One way to mitigate this is to have proper lighting on the test block and also to use test blocks that have grid lines to outline the required spacing. Additionally, marking indentations that violate the spacing requirement using a Sharpie type pen is also acceptable, although, this needs to be stated within internal procedures. Another common challenge with suppliers is with regards to the question within paragraph 3.9.2.8, which asks if the hardness testing operator verifies the anvil/fixture to ensure the absence of damage. What makes this a challenge is when operators forget to do the examination prior to testing.
I would be remiss not to point out what seems to be a confusing point with both select Nadcap auditors and suppliers: the inspection of the indenter prior to testing. This is not, in any way, an ASTM E-18 nor a Nadcap requirement. This is a Boeing requirement. If suppliers perform testing in accordance with Boeing requirements, an inspection of the indenter is required and, if not, it is not required although it is a good practice, and there is really no reason why an operator should not inspect the diamond indenter, using magnification, prior to daily verification testing.
Section 12: Vickers Hardness Testing
From my experience, there are not many challenges associated with Vickers testing except the general items mentioned earlier with regards to the basic verification process.
Section 13: Conductivity Testing
This section covers conductivity testing for aluminum. A common challenge I see is in stating the oscillator frequency in procedures/records. This is something that should be verified during calibration and at the time of purchase. Another challenge is the calibration frequency. Different prime customers may have more stringent calibration frequencies than the manufacturer, so it is important to understand your customer requirements.
Summary
Accounting for Nadcap checklists requirements is two-fold: 1) documenting customer and checklist requirements and 2) showing evidence the requirements are met. To do this, suppliers should understand the checklist and interpret the requirements as clearly as possible. Part 5 of this series will explore Nadcap Checklist AC7102/8.


