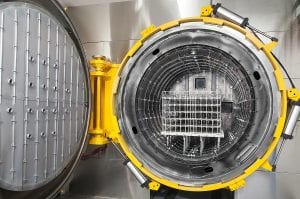
Control of the ion nitriding process is typically based on temperature of the work piece, composition of the gas mixture, gas pressure, nitriding time, gas flow rate, plasma frequency, and duty cycle. It has also been known that plasma density may have an effect on the thickness of the nitrided layer and specifically the compound zone formed at the surface [1-6]. However, plasma parameters, such as power or current density, cannot be considered as the values, which could be controlled easily during the regular processing of the commercial load. The published results were based rather on laboratory than industrial values. Literature on this subject is rather limited and vague. A. Marciniak investigated cold-wall systems and the effect of power density in the range of 0.61 to 1.16 W/cm2 on the case depth and compound zone thickness in Nit135M and 3%Cr steels and concluded there was no effect on nitriding results. J. Conybear and B. Edenhofer tested the same issue in a hot-wall system in a power density from 0.23 to 0.87 W/cm2, showing that the higher power density increases the thickness of the compound zone in several steels including 4140. They did not elaborate on the case depth but mentioned there was no effect [6].
It seems to be very obvious that, in industrial applications, the power density varies from one system to another and depends on the load size, density, its configuration, as well as the nitriding mode. However, in the systems without auxiliary heating — the so-called cold-wall vessels — power density can be controlled in a very limited range by using the mode with the cathode shields-off and the mode with the cathode shields-on.
It could be expected that how the heat is delivered to the cathode may play a role in formation of the active nitrogen spices reacting with the cathode. The heat balance can be written in the following way:
 Formation of the active nitrogen species such as N2+, NxHy+ ions, active nitrogen atoms as well as NH3 molecules by the glow discharge, depends on its density. Also, the heat delivered to the cathode directly from plasma only, GGLOW is larger than the heat delivered by plasma when a significant radiation from the shields is added. Therefore, larger glow discharge intensity on the cathode may increase the quantity of the active nitrogen species resulting in a thicker compound zone/diffusion zone. A typical heating and nitriding in the cold-wall system equipped with the cathodic shields is shown in Figures 1-2.
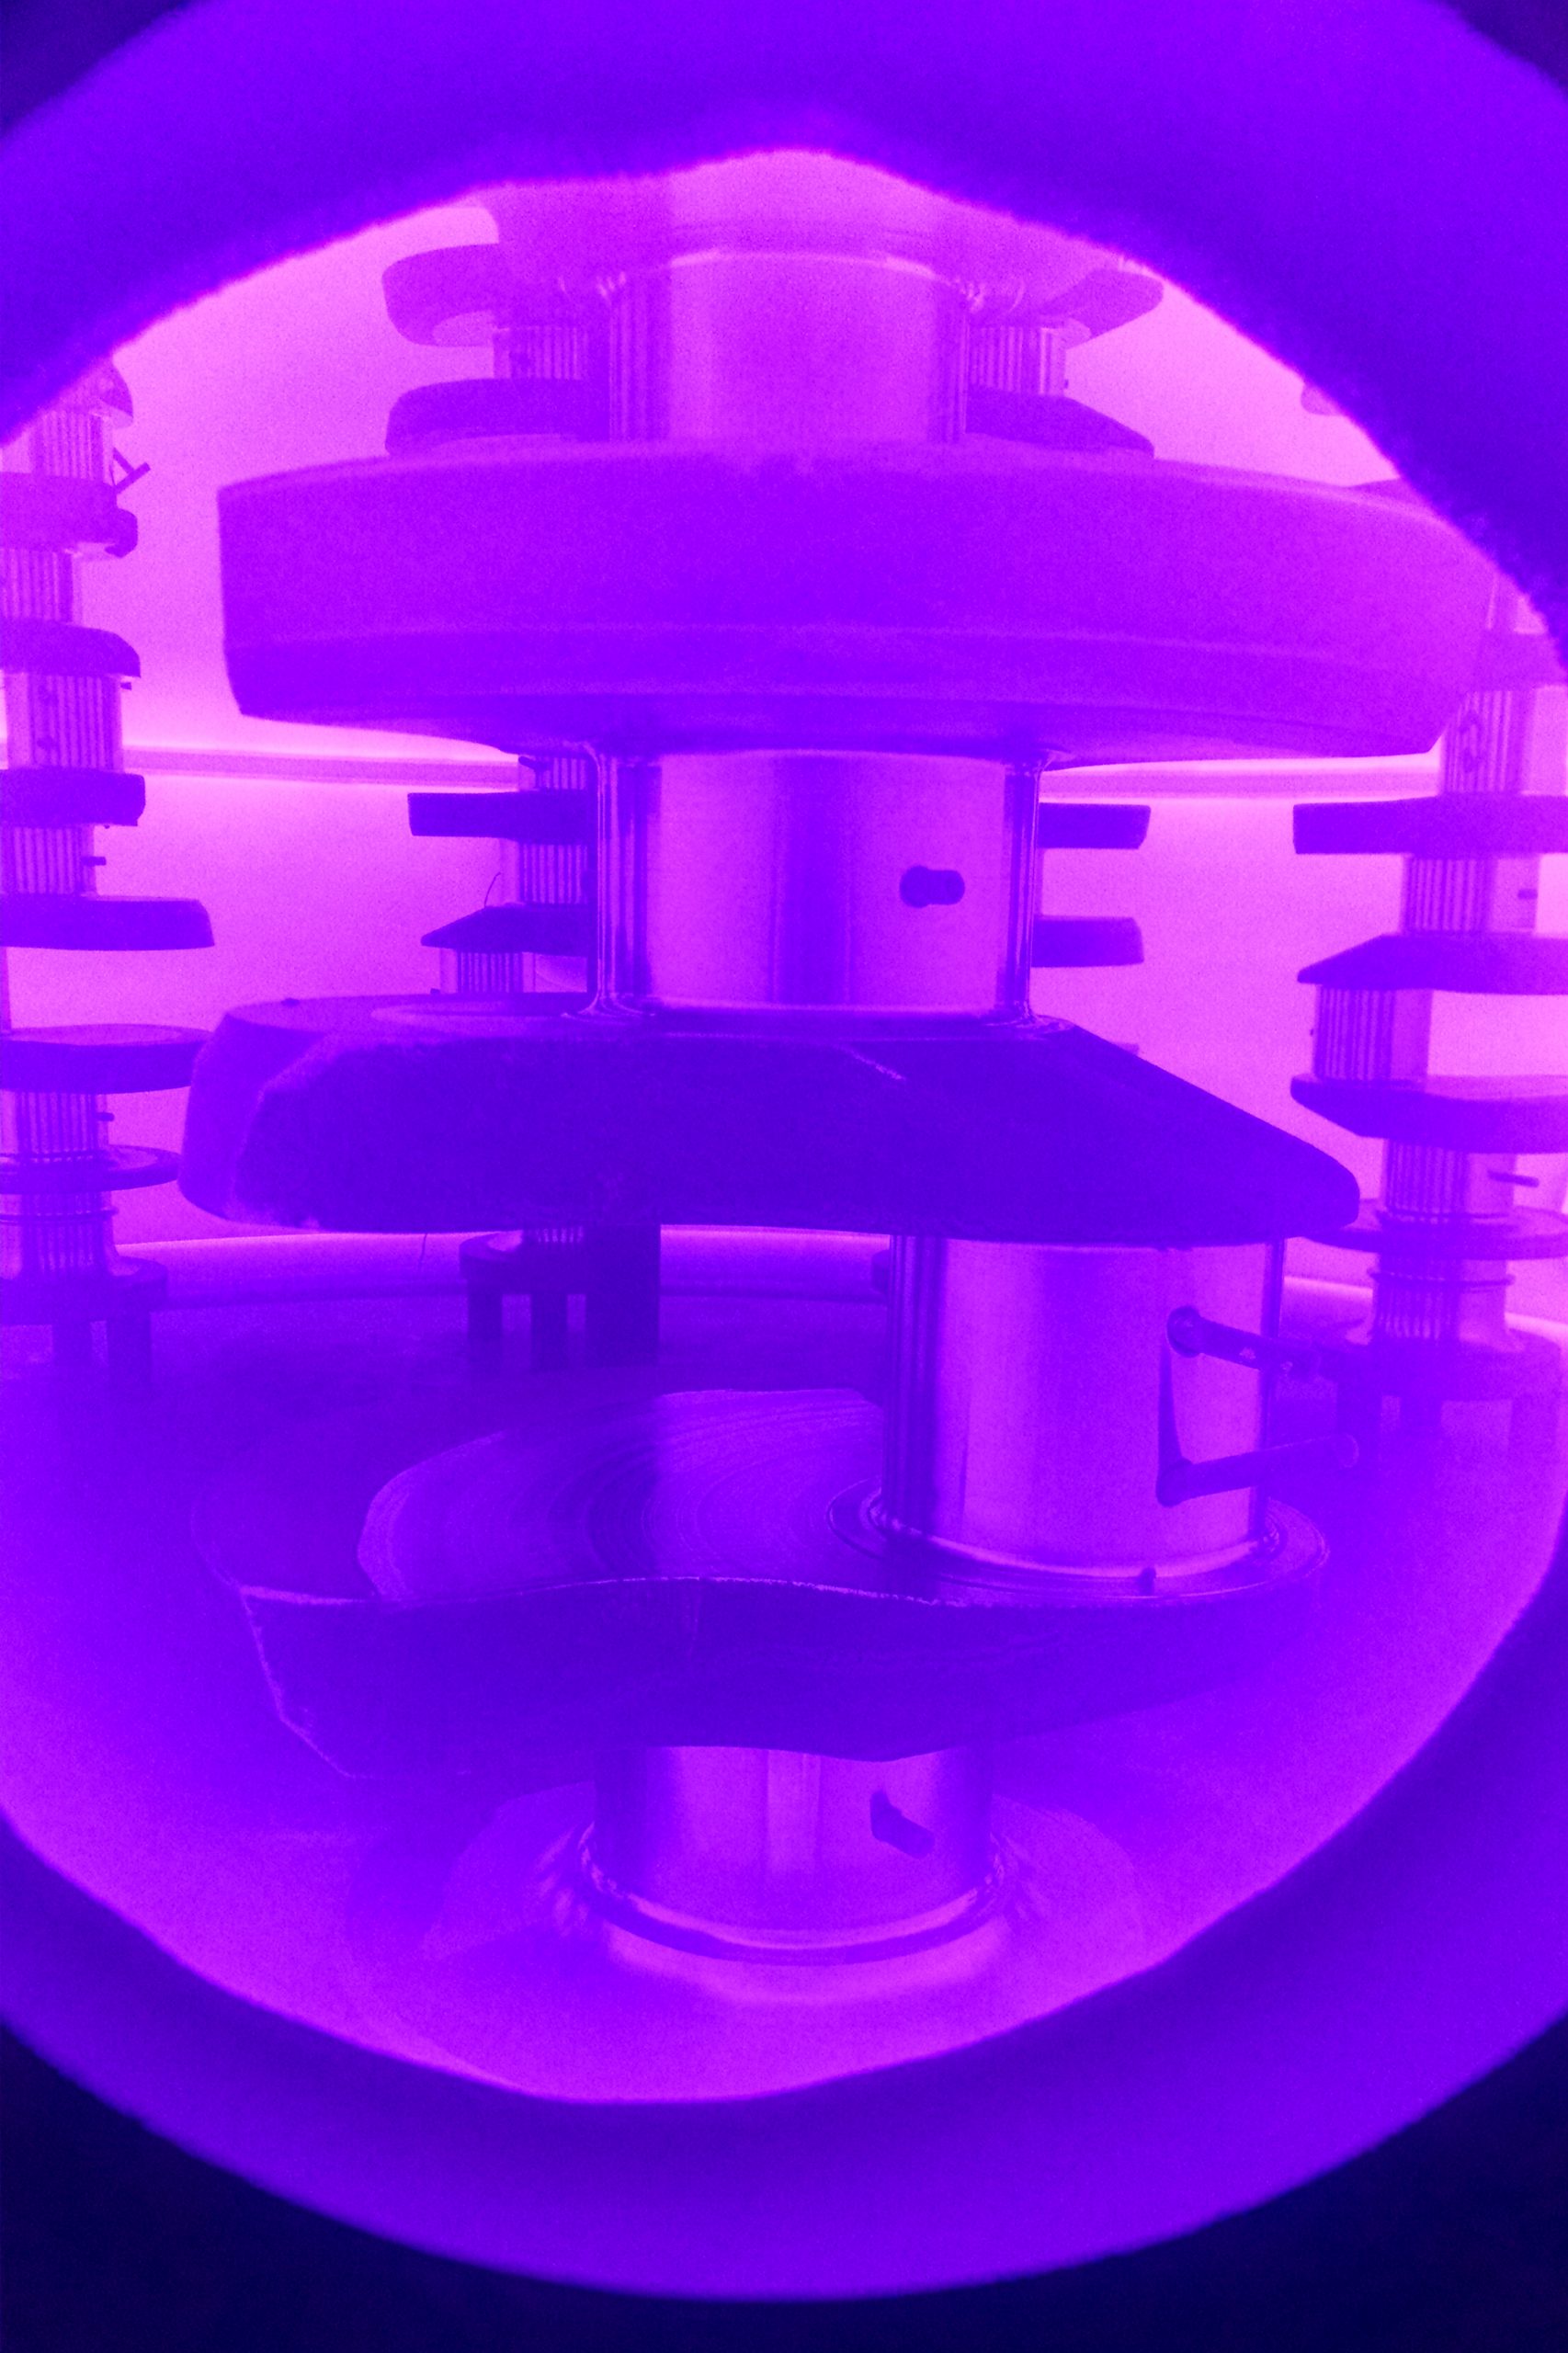
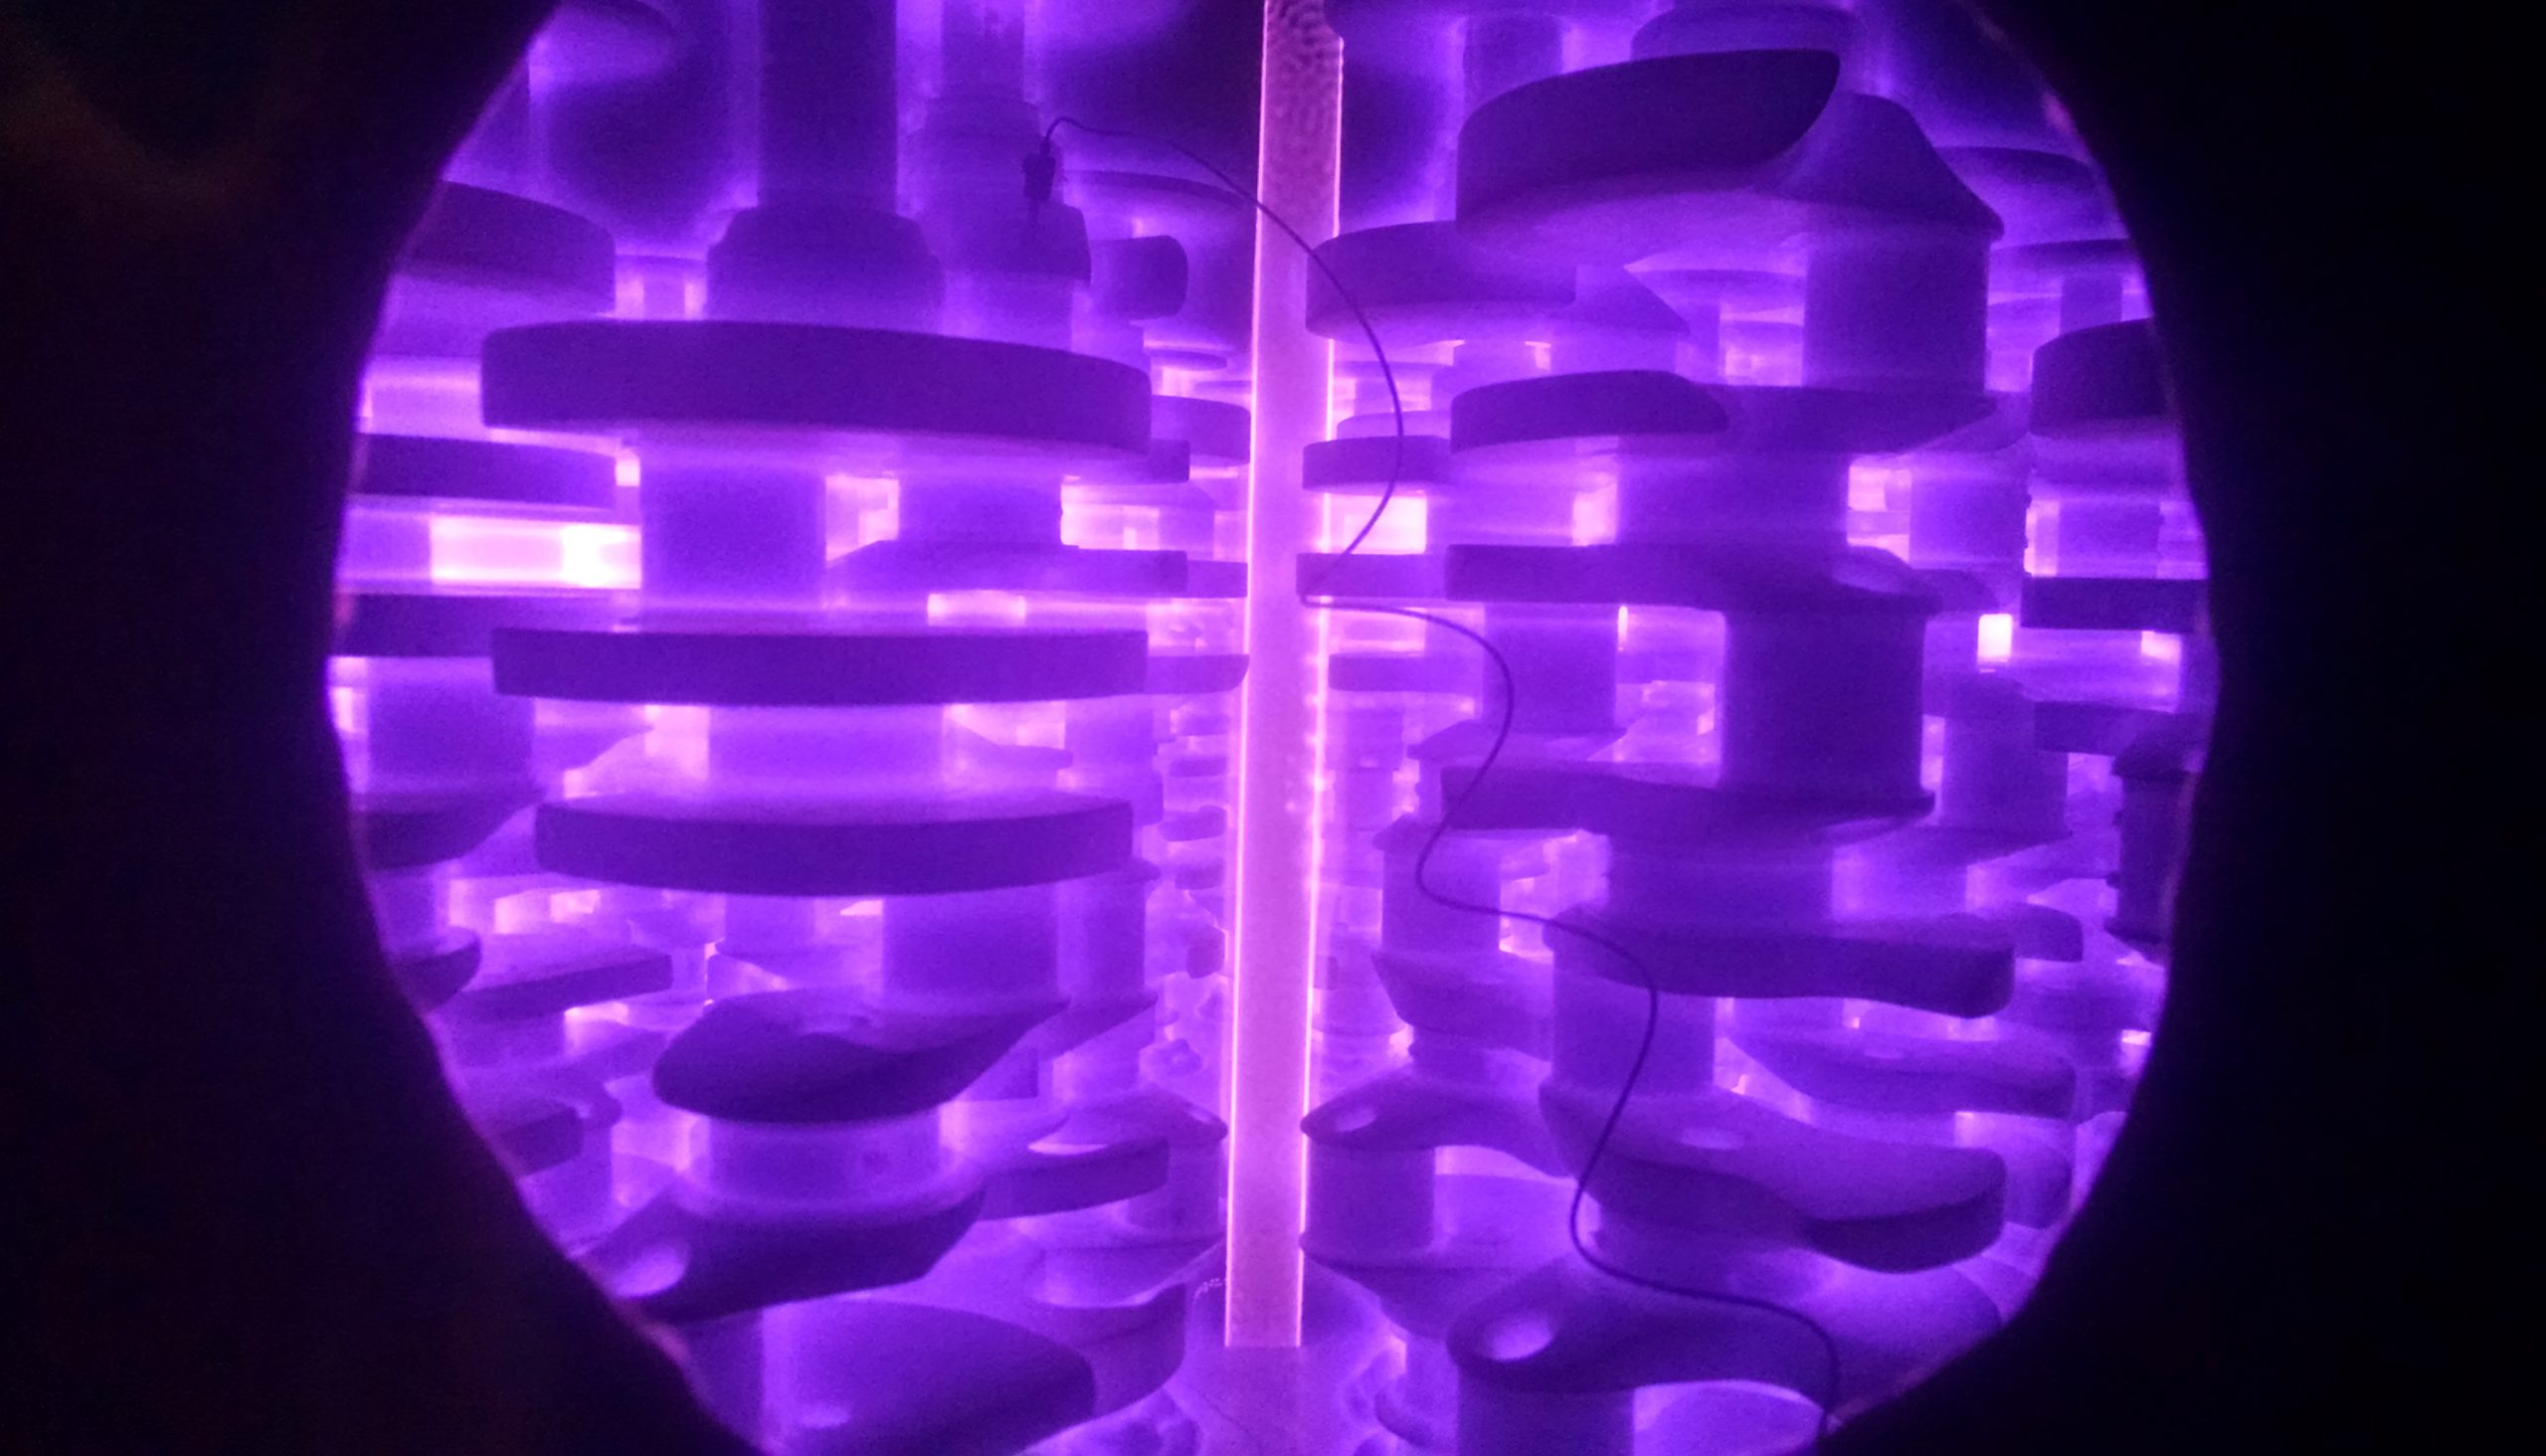
The main purpose of our investigation was to test the effect of power density on nitriding results in these two modes:
1) Cathode shields-off with the base-on in the industrial-size ion nitriding furnace.
2) Cathode shields-on with the base-on in the same furnace.
Experimental
The experiments were carried out at constant temperature of 499°C (930°F) and 460°C (860°F) with 20% nitrogen, 80% hydrogen, at pressure of 3.46 mbar (2,600 microns) and a nitriding time of 48 hours. Ramping details were identical, and the processing was carried out with a frequency of 7.143 kHz. The first experiments were carried out in the “base-only” mode, and the second experiments were with the “base and shields” mode.
The samples used for the experiment were a portion of the actual production crankshaft (“nose”), which are made of quenched and tempered TMS 80 micro alloyed steel. Both samples were sand blasted before each cycle. Every sample had a hole of the same depth of 30.8 mm for the thermocouple as shown in Figure 3.

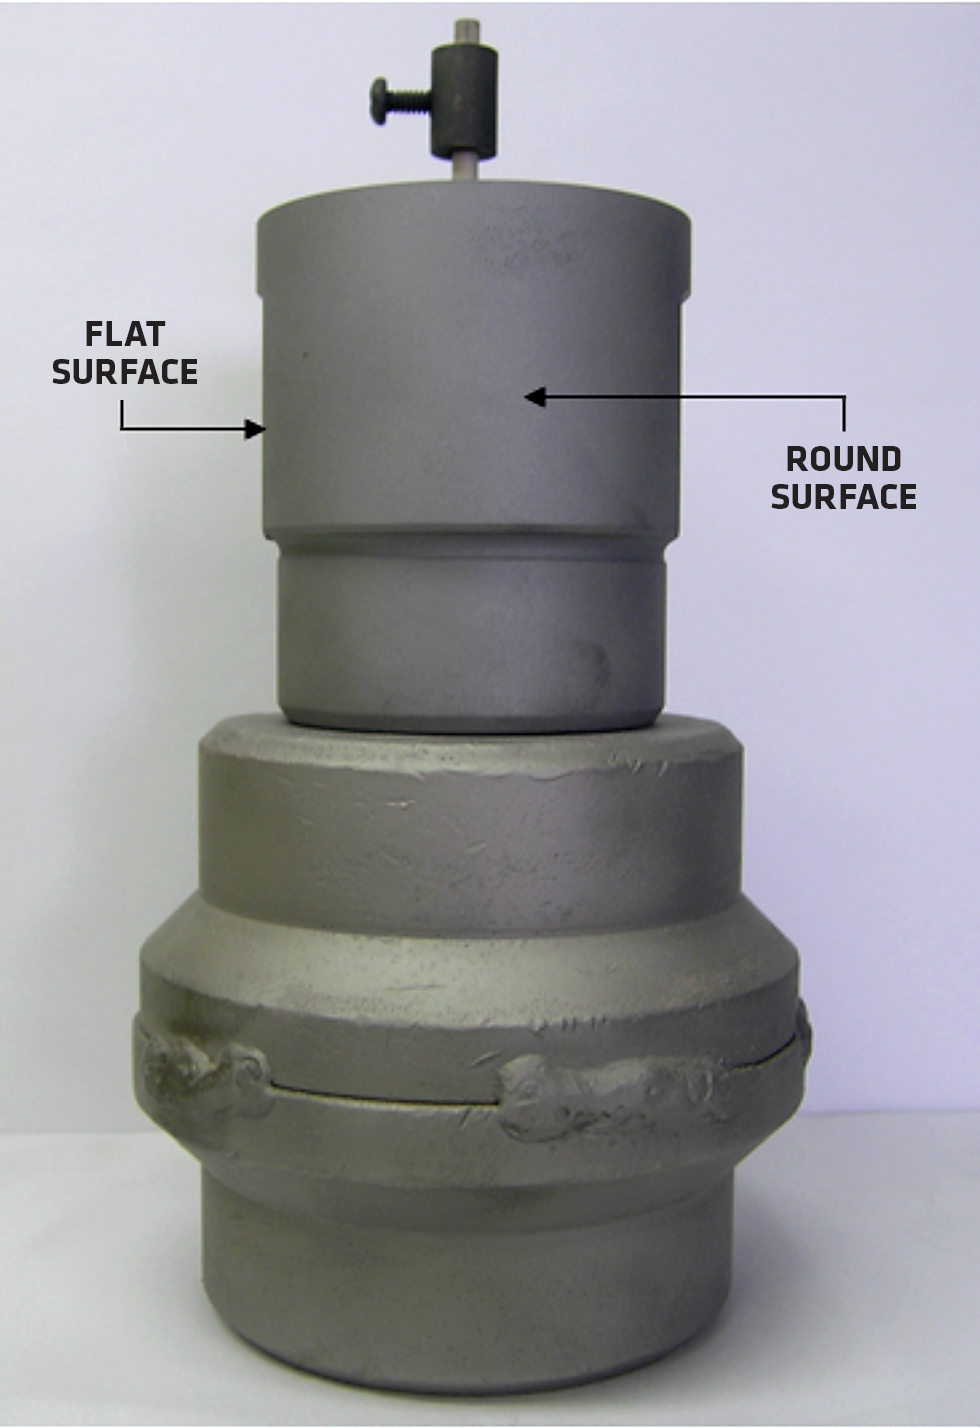
Special care was taken to make sure the samples and their arrangements in the vessel were identical in all tests and that the only difference between both groups of tests was the difference in the power (current) density. Run data analysis confirmed both experiments were like mirror copies of each other.
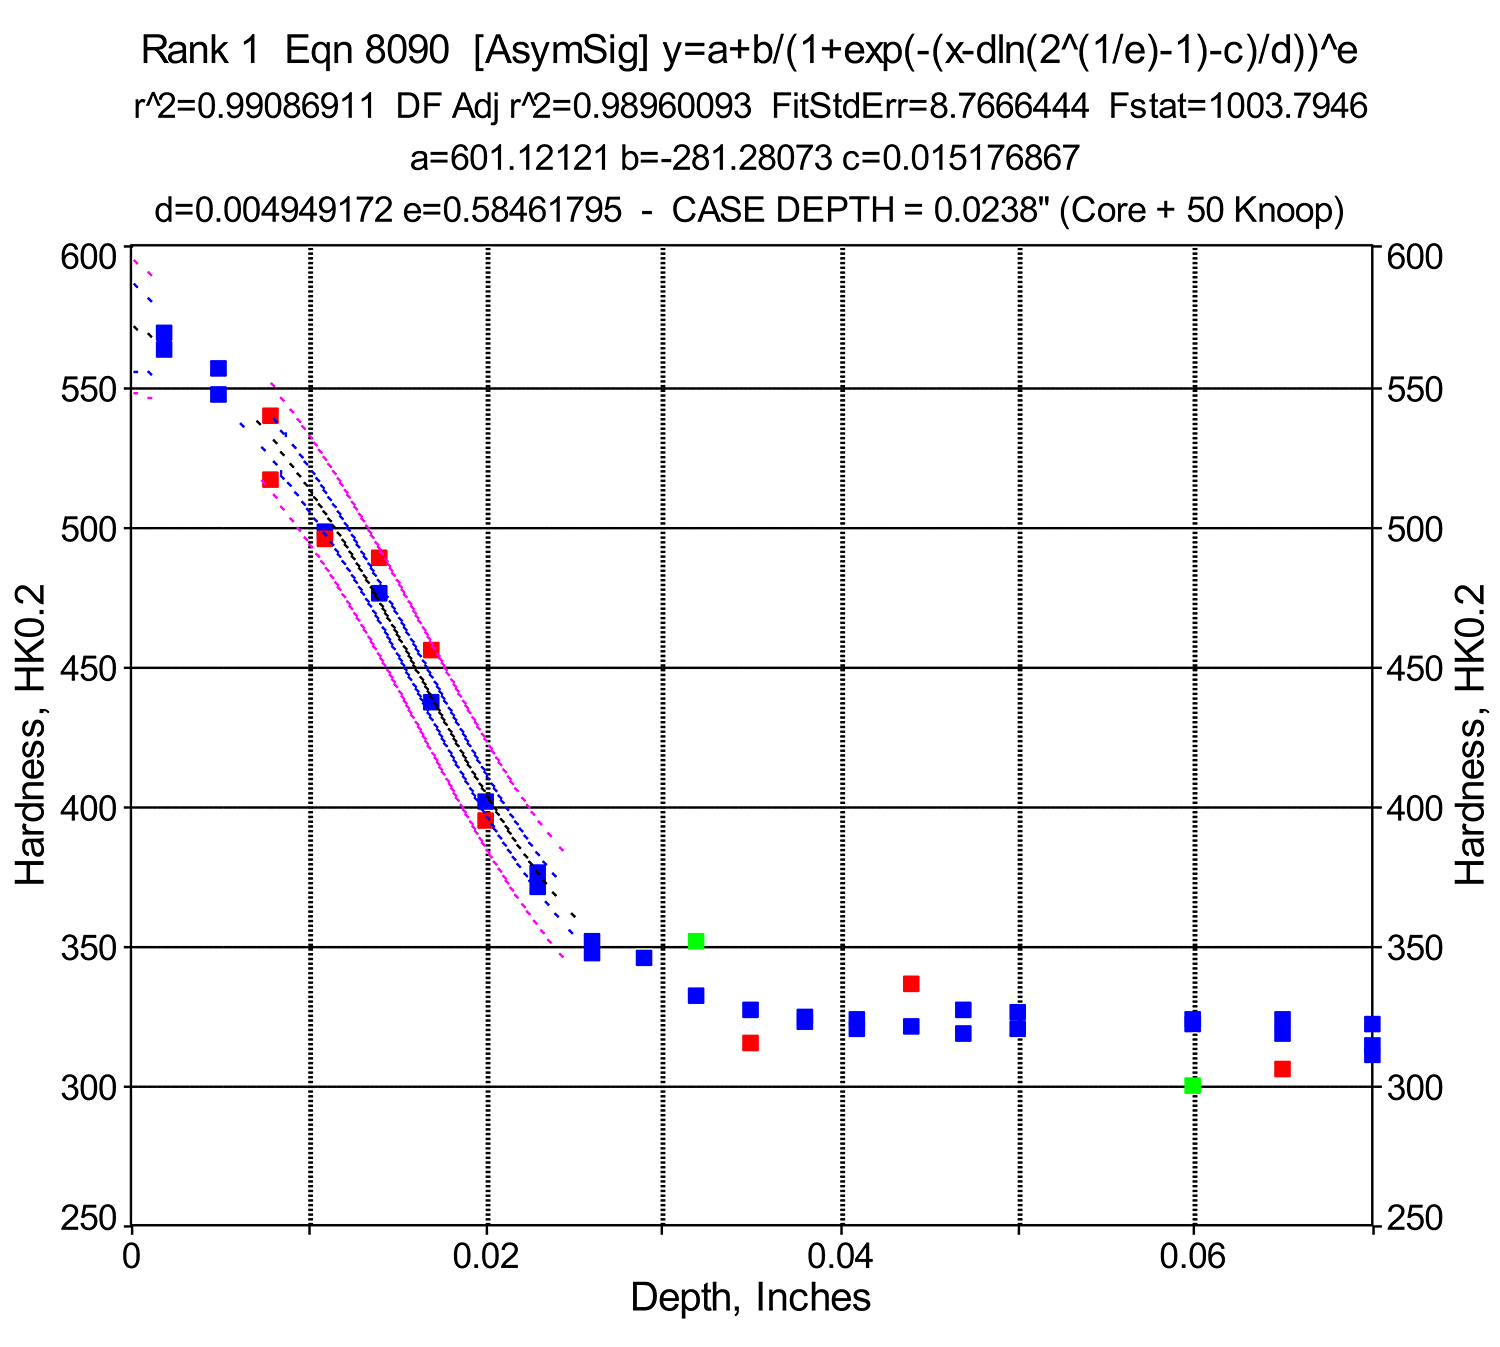
Both samples were sectioned in the area at the end tip of the thermocouple and tested metallographically. There were two areas tested in each sample: one referred as a “flat surface,” and the other referred as the “round surface.” Microhardness was tested using a Knoop indenter and a load of 200 g. For better statistical validity of the tests, there were two technicians involved in testing of each sample. The data was plotted for each sample using a TableCurve2D® statistical program. The same curve-fitting equation number, 8090 (Asym Sigmoid), was used for plotting all graphs. The 95 percent level of statistical confidence was used to plot the confidence and predictive intervals on the graphs. The confidence interval is the region in between the two blue lines, and it deals with the estimate of the fitting function. The prediction interval is the region in between the two pink lines, and it deals with the data. The total case depth was determined using criterion core hardness plus 50 HK0.2 based on the hardness profile calculated from the best-fit equation for a given data set.
Results and discussion
Pre- and post-hardness data for both samples are presented in Table 2. They were taken on the flat and round portions of the samples. (Figures 4-7)

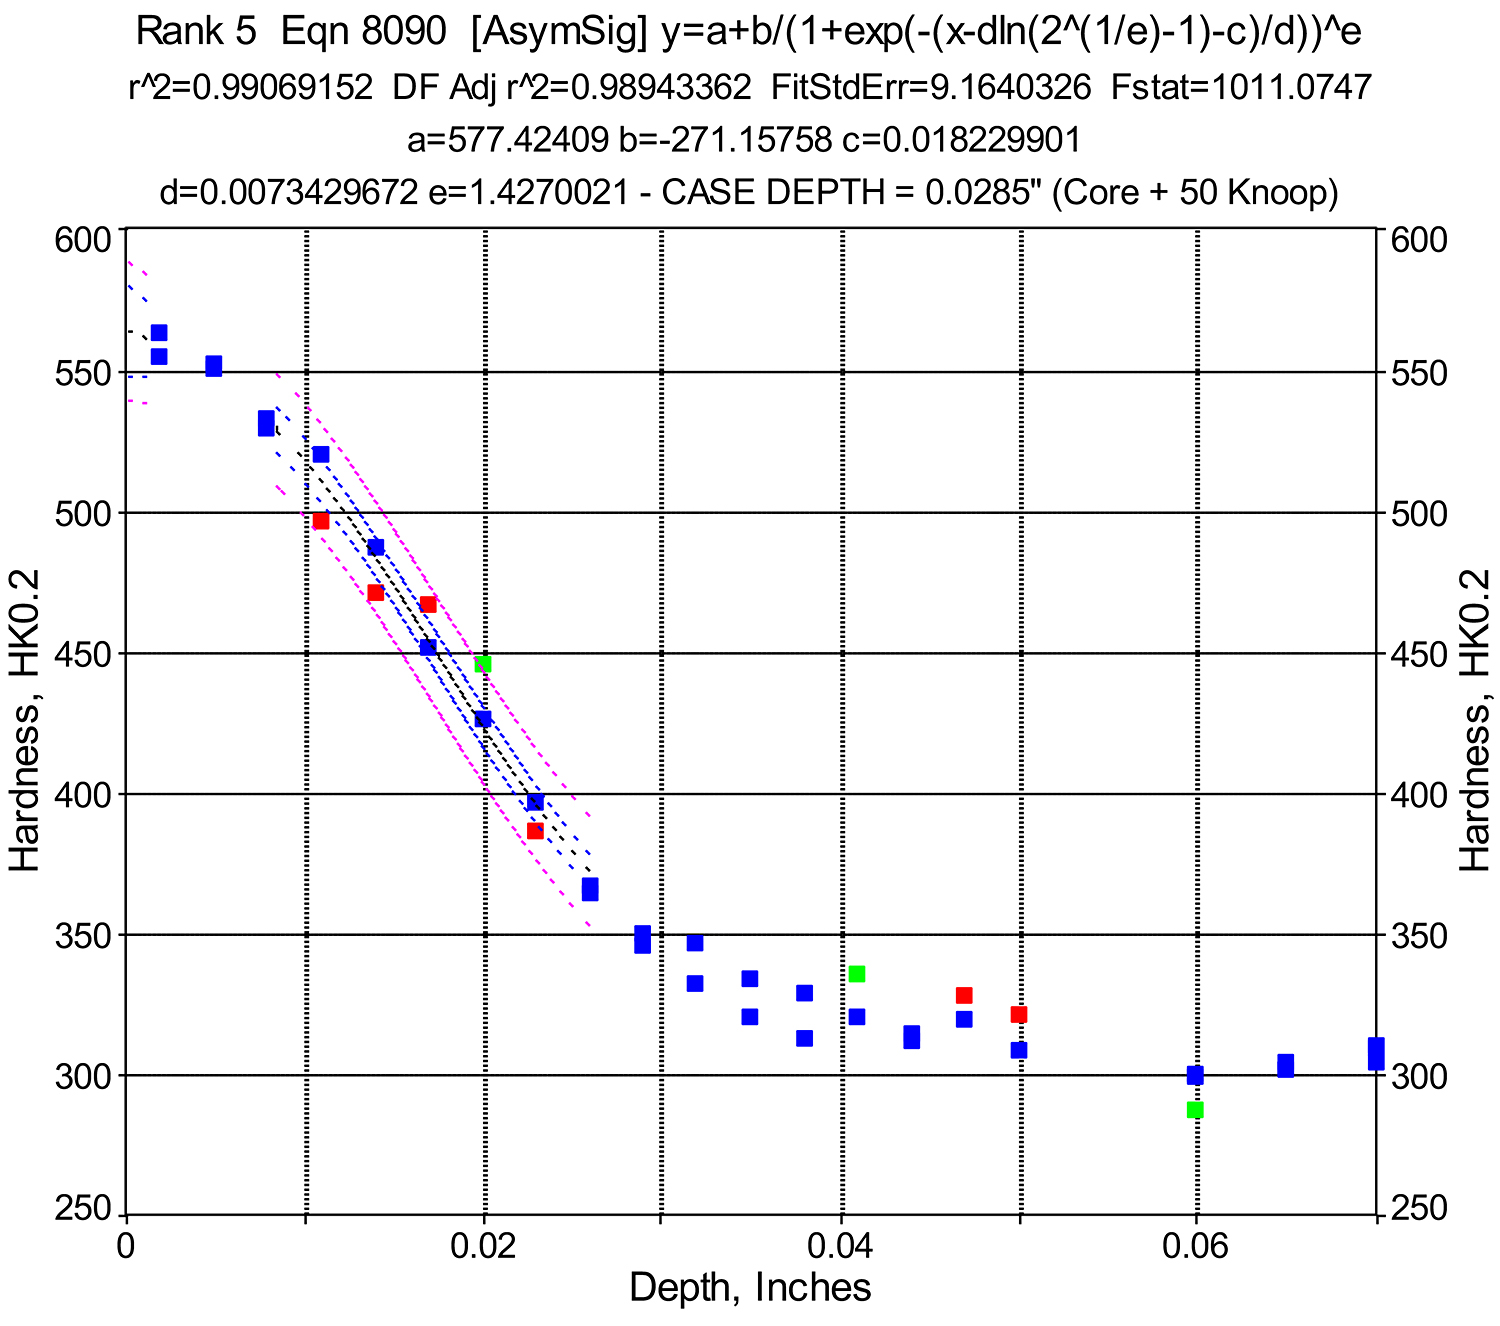
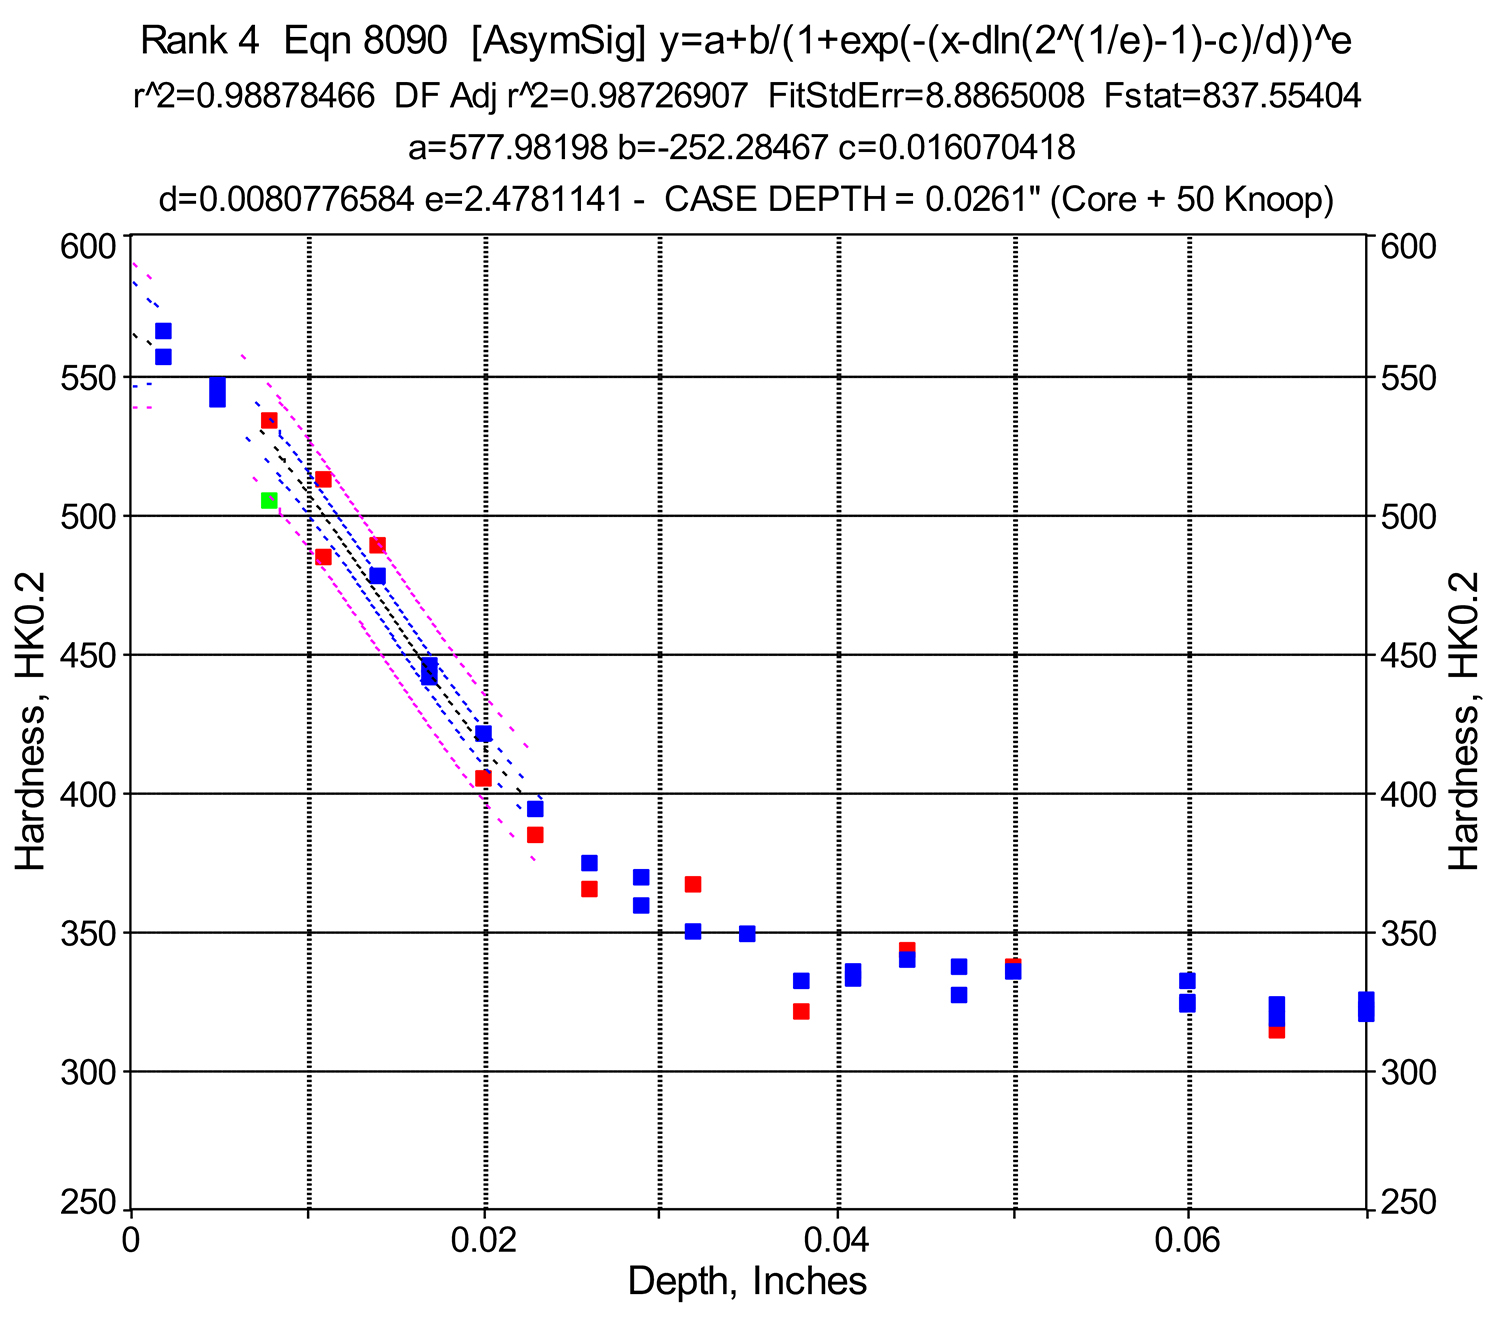
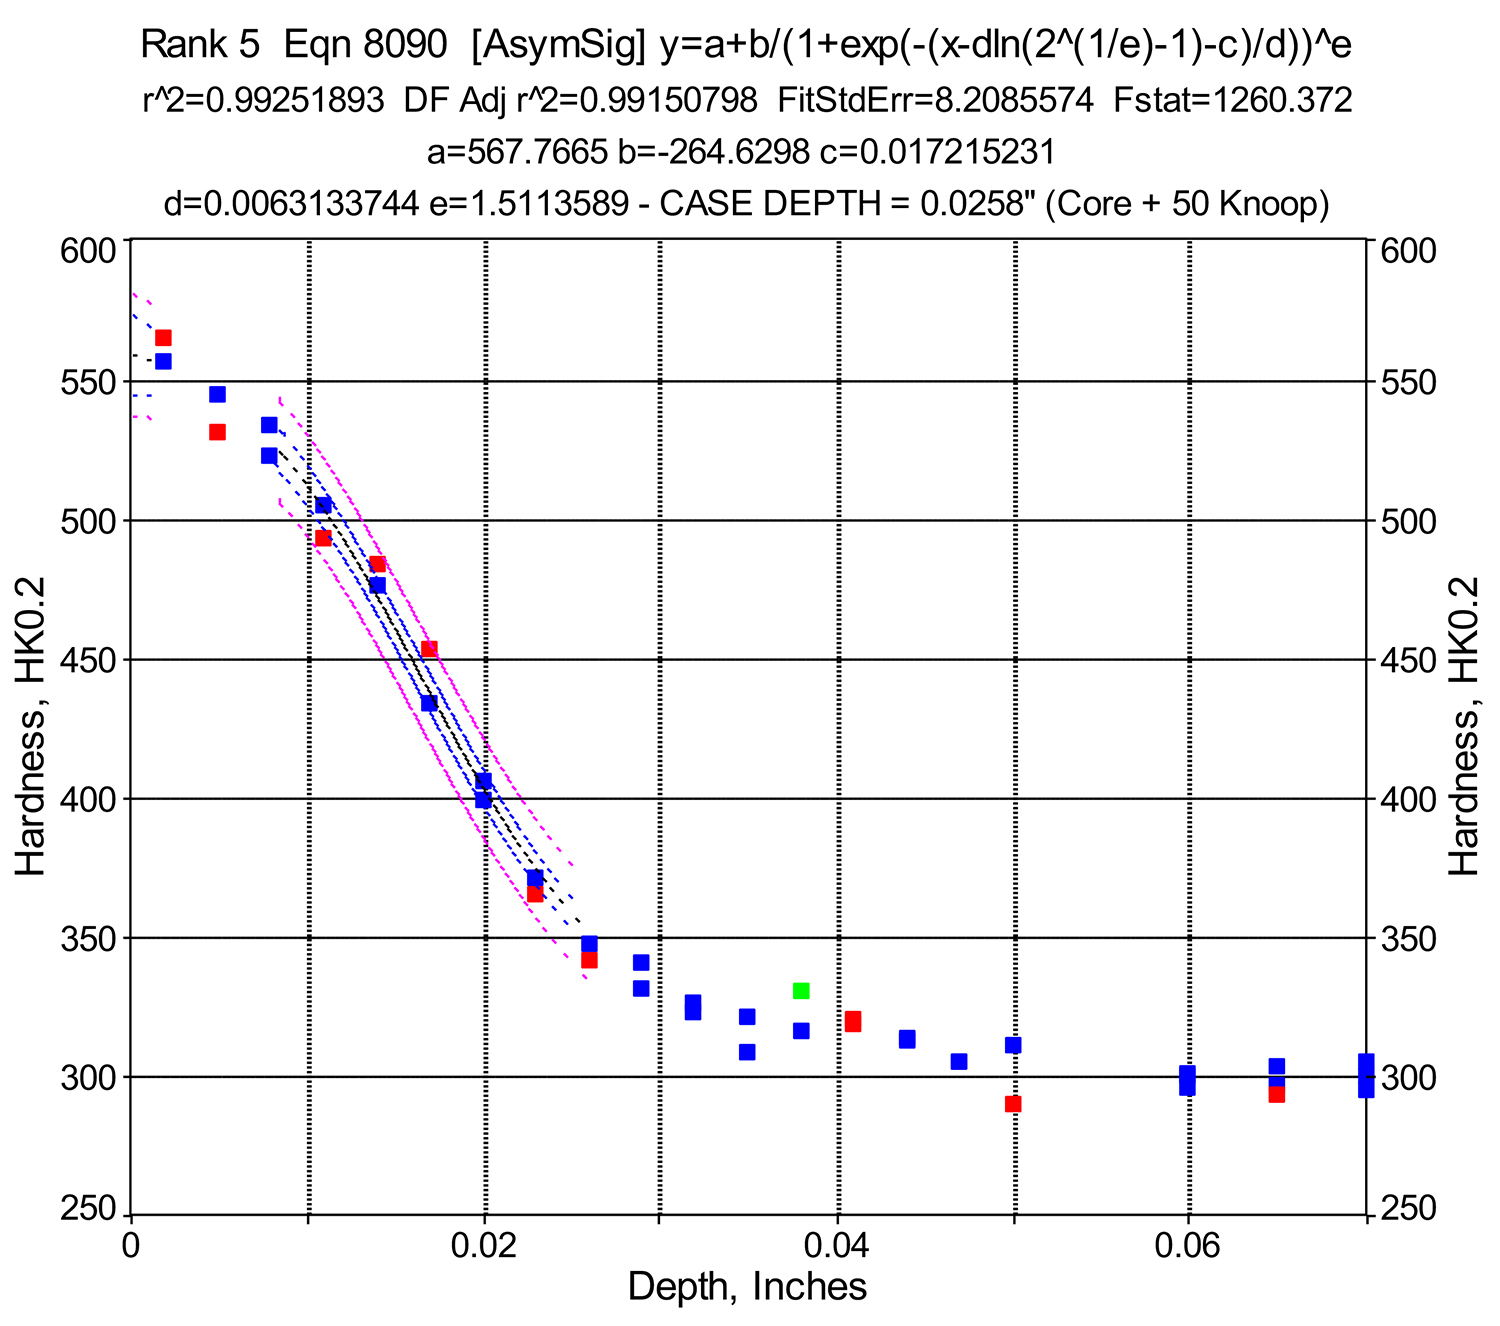
The results indicate that there might be small differences between the two samples. Are these differences statistically significant? Can it be justified to say the “base only” mode produces better results, deeper case depth, hardness, etc., than the “base and shields” mode? The hardness data seen in Table 1 seems to be almost identical. The HR15N results are different only by 0.3 for the flat surface samples and by 0.4 for the round samples. The hardness of the samples in HR30 N is similar. We can then conclude the hardness data justifies us to say there is no difference between the samples.
The case depth data summarized in Table 3 may look, at first, as if there are more significant differences between the two samples. Are they really significant? The case depth results vary from 0.0238 to 0.0285”. The data produced by Person 1 and Person 2 are not exactly from the same location of one sample but from the eight locations of the four different samples. Therefore, there are several potential errors cumulated here:

(*) Indicates testing Person 1 and (**) for testing by Person 2.
1) Effect of surface preparation on diffusion rate. The flat surfaces of the samples were machined (milled) after a turning operation applied to the round surfaces. They are then not identical even if both of the surfaces were blasted before nitriding. We must not exclude there is no difference in the nitriding rate between such prepared surfaces. Perhaps the most “distorted” steel (flat) has a slightly higher rate of nitriding than the round steel. This may actually be true. When we look at the case depth data for the flat surface sample only, we can see the results are systematically higher than for the round surface sample and are independent from the person doing the actual testing. These results for the flat surface are in the range from 0.0258 to 0.0285”. The similar results for the round surface are in the range of 0.0238 to 0.0261”.
2) Lack of structural homogeneity of the steel. It is very likely the steel does not have a perfectly uniform grain structure, exactly identical chemistry, etc., and this statement is supported by the hardness “pre-nitride” results. They are close but not identical. This is absolutely normal and is very well described by the sentence: “Heat treatment is not exact science.”
3) Systematic difference between testing persons. There was no systematic difference in the testing between the persons involved, like one person always testing deeper than the other one; Person 1 vs. Person 2. They both had systematically slightly deeper cases in the flat sample than in the round sample. This supports conclusions of error 1 above. Since both of them had also rather contradictory results of the round samples, Person 1 had a slightly deeper case in the “base-only” sample than the “base and shield” sample, and Person 2 had it reversed; we can conclude there was a difference in between the round samples.
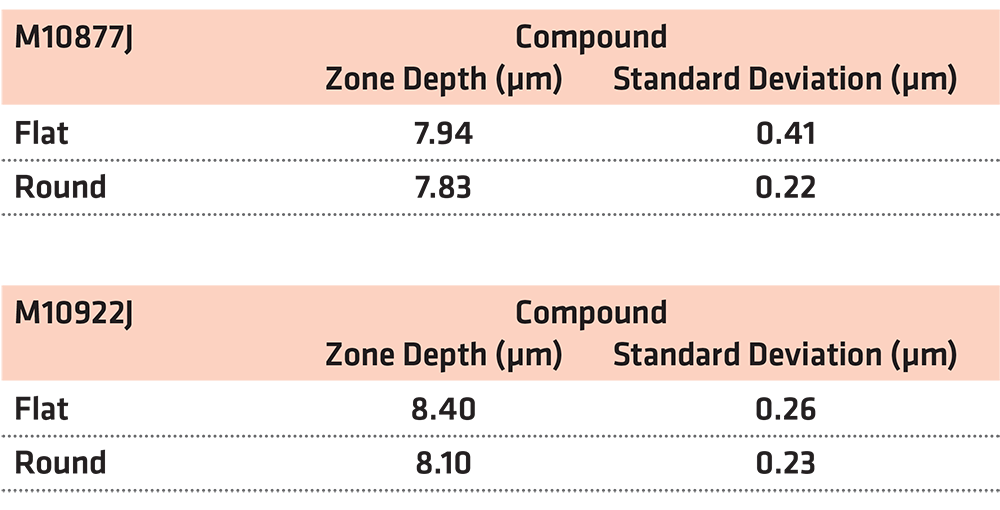
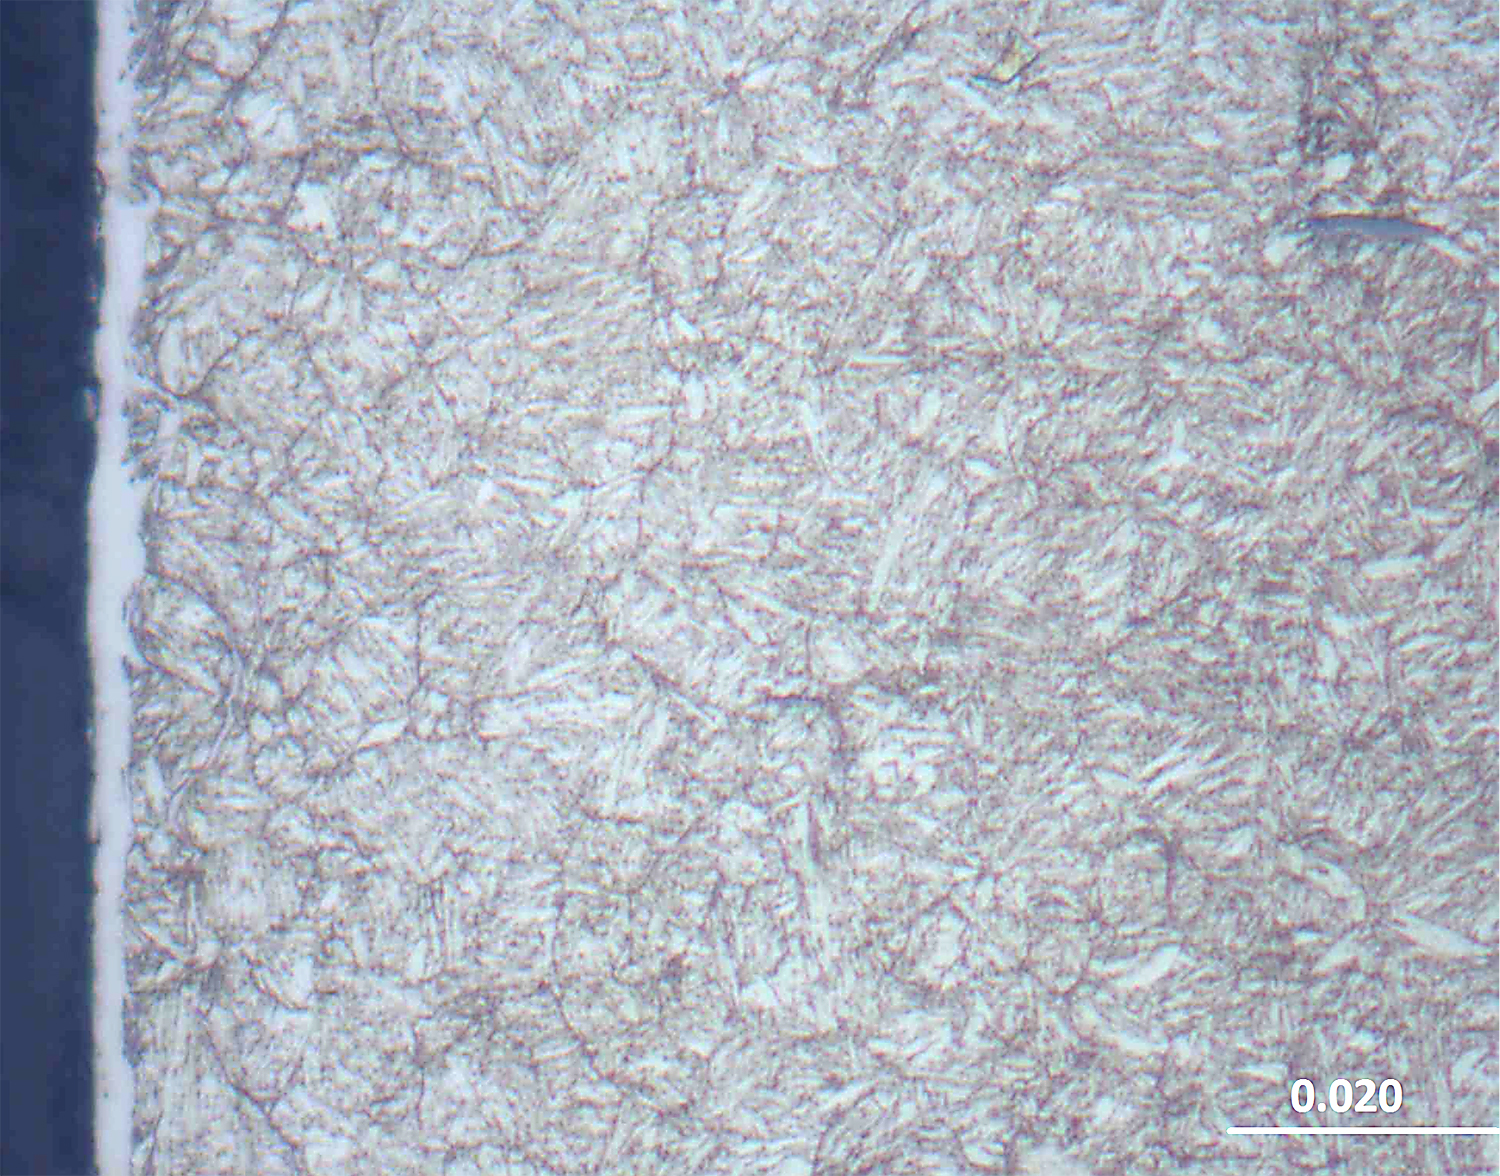
Differences in compound zone thickness are very minimal as shown in Table 4. The thickness achieved in the “base and shields” mode might be a little higher than in the “base-only” mode. However, all the data for two of the modes of nitriding are in the range of ±3 standard deviations. Also, careful examination of the microstructure shown in Figure 8 illustrates very well how much variation is in the compound zone itself. We can assume then, statistically, the results are identical.
Results of ion nitriding at 460°C (860°F)
The same size sample was nitrided at 460°C (860°F), which was recorded as the lowest temperature occurring in the load of production runs. As it is verified, the runs were extremely stable and exactly at the required temperature.
The “shields and base” nitriding mode was used, and the remaining processing parameters were kept the same as in previously described experiments. Hardness profiles curves are presented in Figures 9 and 10. As it can be seen from the graphs and Table 5, the case depth is at the bottom of the specification, which is 0.5 mm (0.01969”) or slightly below it.

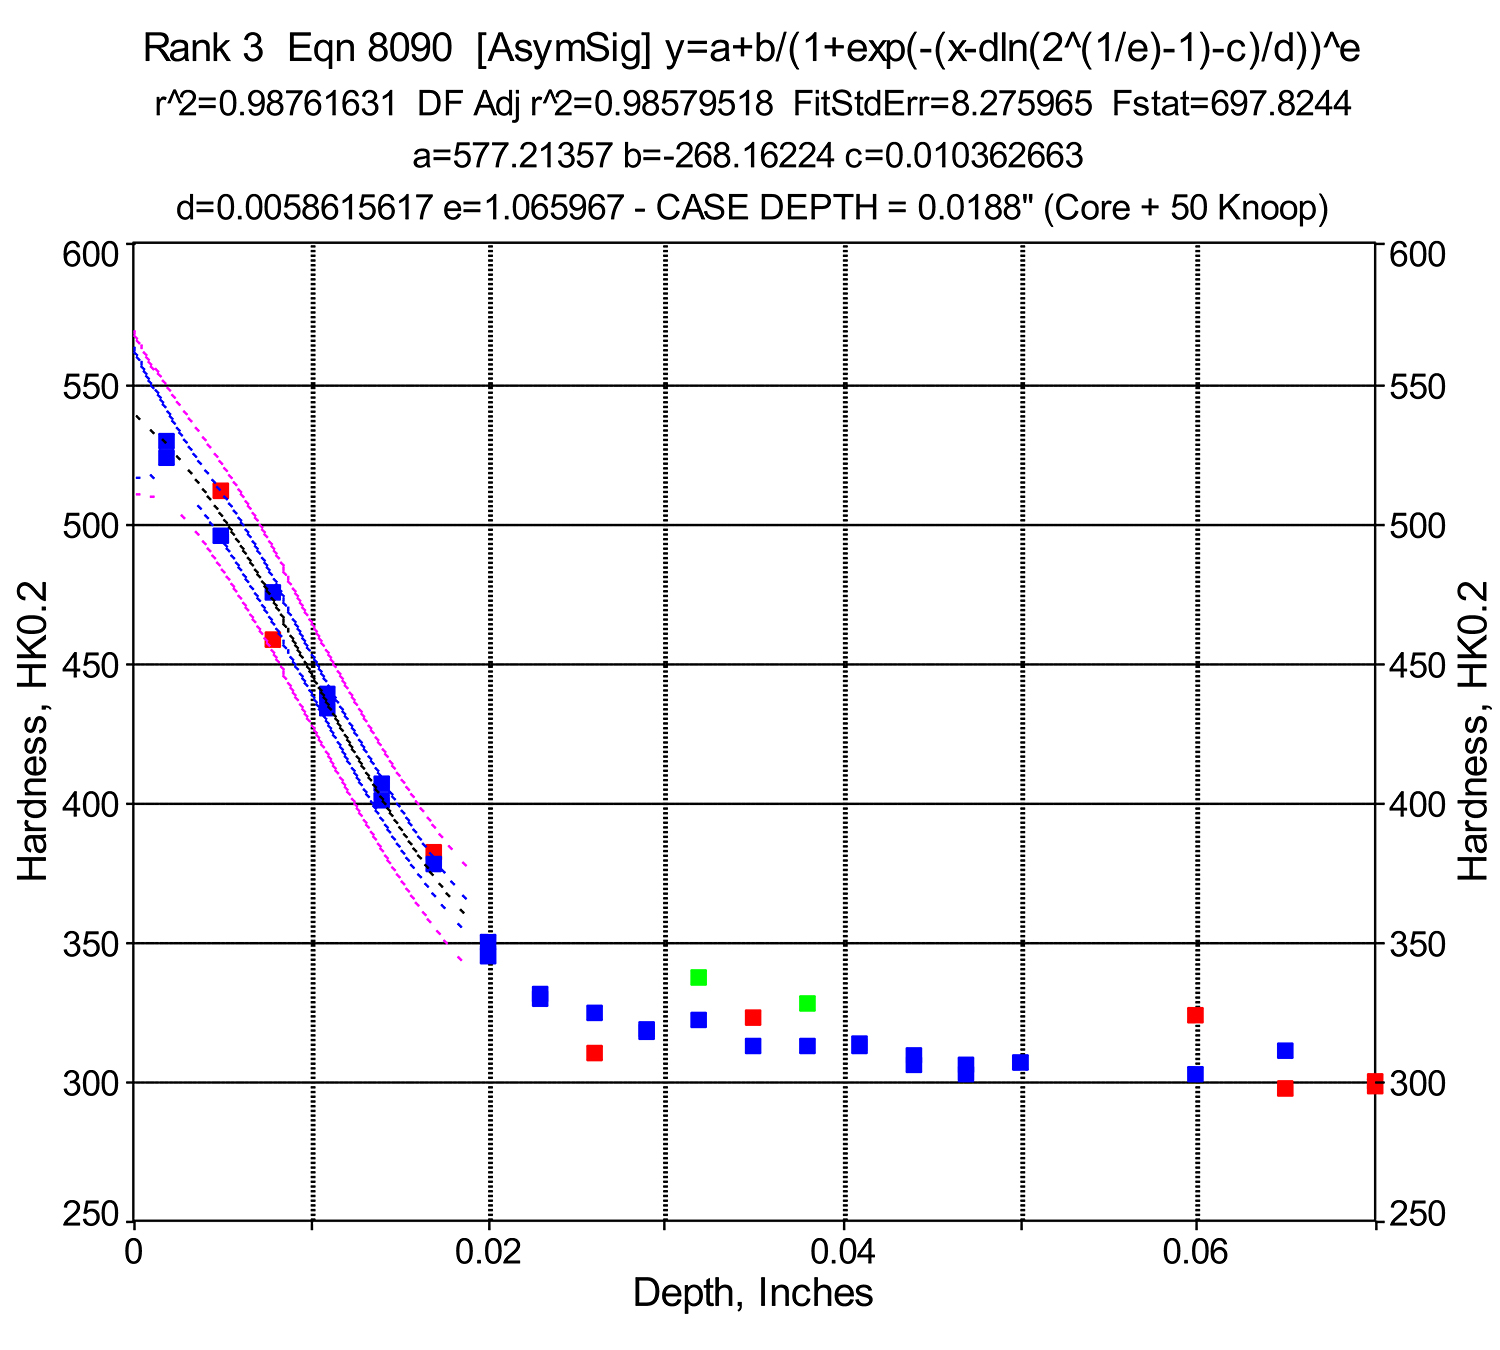
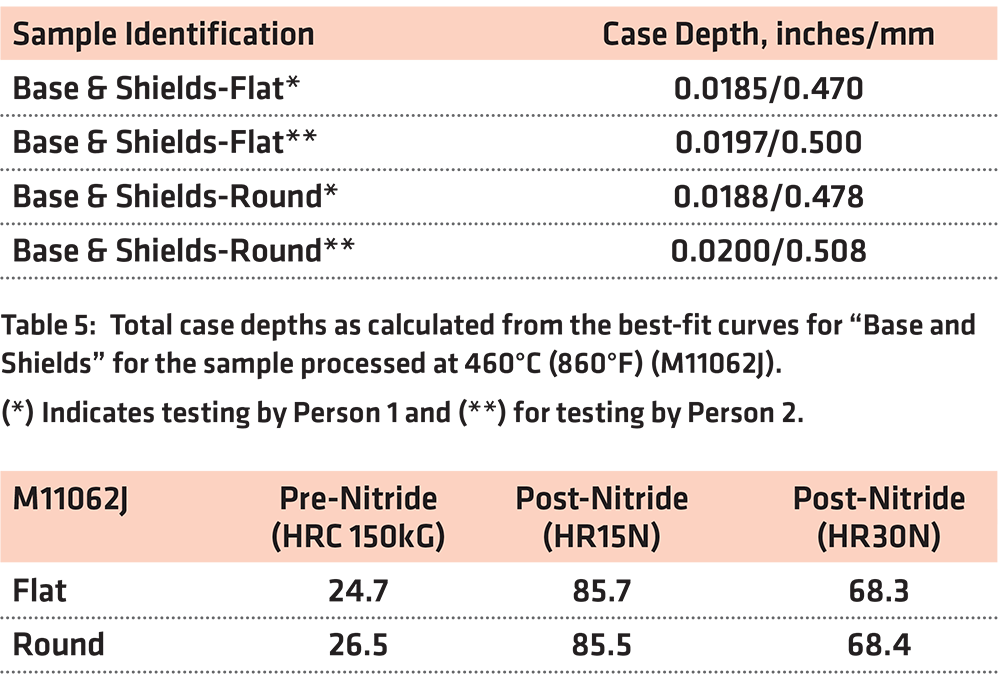
The results presented in Table 6 demonstrate one more time there is a small variation in the case depth in the sample itself and more likely a variation in testing and between the people conducting the test. All this conforms to our prior statements.
Conclusions of this last experiment are there was no difference in nitriding response between “flat” and “round” sample nitrided at 460°C (860°F).
Final conclusions
The results confirmed that in the tested range, plasma power/current density has no effect on the case depth when the other remaining nitriding parameters are kept constant. This is very likely the case in all the situations, where the structure of the nitrided layer contains both compound and diffusion zones.
In situations where the compound zone is not required (example tools made of M-2 or similar) or does not form (example austenitic stainless steels), the nitriding rate will depend on power density. The nitriding rate will be faster with a greater power density.
The effect of power density on thickness of the compound zone is not very clear. However, the literature data strongly suggests the thickness of the compound zone is increased when plasma power density is raised. The change of power density may also have an effect on morphology and phase composition of the compound zone, and this may have a potential effect on kinetics. There are some suggestions in the literature that this (different morphology and phase composition) has an effect on kinetics of gas nitriding.
References
- E. Rolinski, G. Sharp, “Controlling Plasma Nitriding”, ASTM International, Materials Performance and Characterization, Vol. 6, No 4, 2017, pp.698-716, https://doi.org/10.1520/ MPC20160051. ISSN 2370-1365.
- E. Rolinski, “Plasma Assisted Nitriding and Nitrocarburizing of Steel and other Ferrous Alloys”, Chapter 11 in Thermochemical Surface Engineering of Steels, Ed. E. J. Mittemeijer and M. A. J. Somers, Pub. Woodhead Publishing, 2014, pp 413-449.
- B. Edenhofer, 1996, Process and apparatus for controlling the electric current density in plasma processes, Patent DE 19 52 1548 and EP 749 147.
- A. Marciniak, (1983), ‘Processes of heating and nitriding of the cathode during glow discharge diffusion treatment’. Doctoral Thesis, Ed. Politechnika Warszawska, Warsaw, Poland, in Polish.
- B.Y. Jeong and M. H. Kim, (2001), ‘Effects of pulse frequency and temperature on the nitride layer and surface characteristics of plasma nitrided stainless steel’, Surface and Coatings Technology, 137, 249-254.
- D. Günther, T. Hirsch, F. Hoffman and P. Mayr, (1998), ‘Einfluß der Plasmaparameter auf die Schichtstructur beim Plasmanitrocarburiren.’ Härterei Technische Mitteilungen, 53, 4, 203-210.
- J.G. Conybear and B. Edenhofer, (1988), ‘Progress in control of plasmanitriding and –carburizing for better layer consistency and reproducibility’, Proc. 6th International Conference on Heat Treatment of Materials, 28—30 Sept. 381-394.
About the authors
Dr. Edward Roliński, a k a Doctor Glow, is the senior scientist at Advanced Heat Treat Corp. and has been studying the plasma/ion nitriding phenomenon since the 1970s. Dr. Rolinski has written countless articles and whitepapers in industry publications and manuals. Chad Clark has been with Advanced Heat Treat Corp. (AHT) since 2003 and is the plant manager at AHT’s Monroe, Michigan, location where he oversees operations for a variety of heat treatments and services. Mikel Woods is the president of Advanced Heat Treat Corp. (AHT) and has been with the company since 2005. Before AHT, Woods worked at HUSCO International, Inc. and PricewaterhouseCoopers, LLC in finance, project management, and sales functions.


